· Shah Zangeneh · Hardware · 7 min read
I Made Beth a Necklace for Christmas
An Adafruit Gemma v2, a 16-LED NeoPixel ring, a LiPo battery, and a Tiffany box. Here is how the pendant(s) came together.
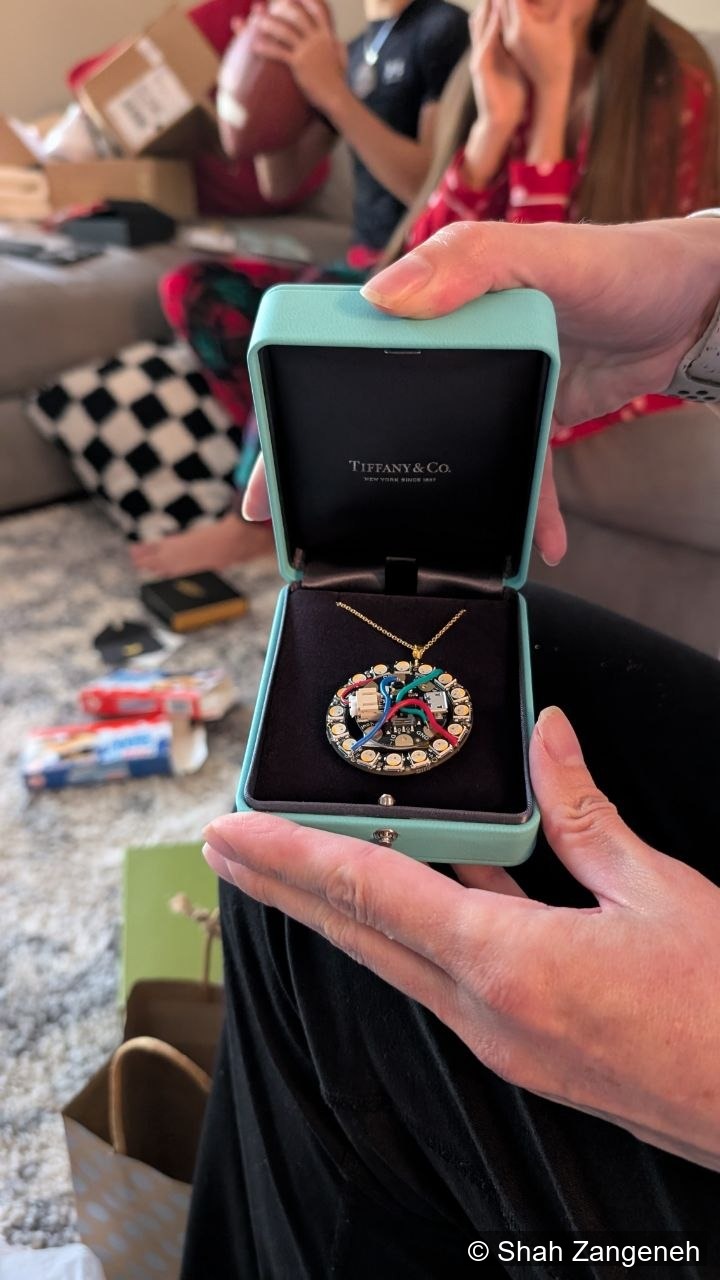
Every December I go through the same cycle: convince myself I have plenty of time, do nothing, and then come up with a nonsense idea and implement it under pressure. The write-up is apparently part of the same cycle. It’s May. This past December, Beth was getting handmade earrings… Scratch that, a handmade necklace.
Not a normal necklace. A 16-LED ring with a microcontroller and a LiPo battery, presented in a Tiffany & Co. box. Whether that makes it a better gift or a stranger one is still up for debate.
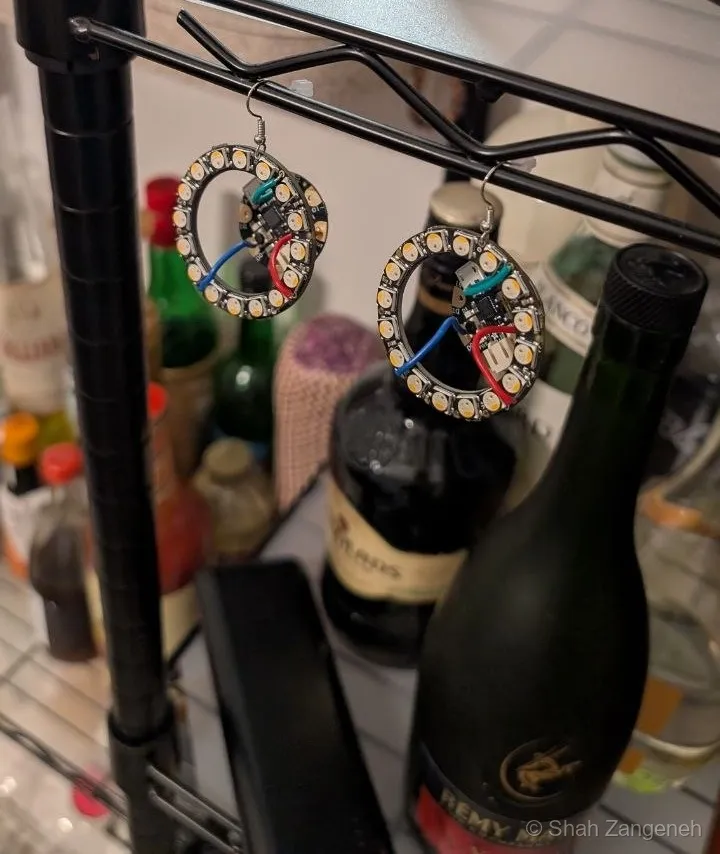
It started as earrings
The original idea was a matching pair of earrings — same hardware, smaller footprint. The problem is that a NeoPixel ring plus a Gemma board plus a battery doesn’t have a smaller footprint (the assembled unit came in a little over 11 grams). My mother and a few friends confirmed pretty quickly that the weight would be uncomfortable on anyone’s ears.
So the earring idea became a pendant idea. And instead of one, she would get two: an Ohio State pendant and a Christmas pendant. Beth’s family are OSU fans, so scarlet and gray felt like the right theme for one of them. For the other? Well, Christmas lights are always a crowd pleaser.
The hardware
Both pendants use the same build:
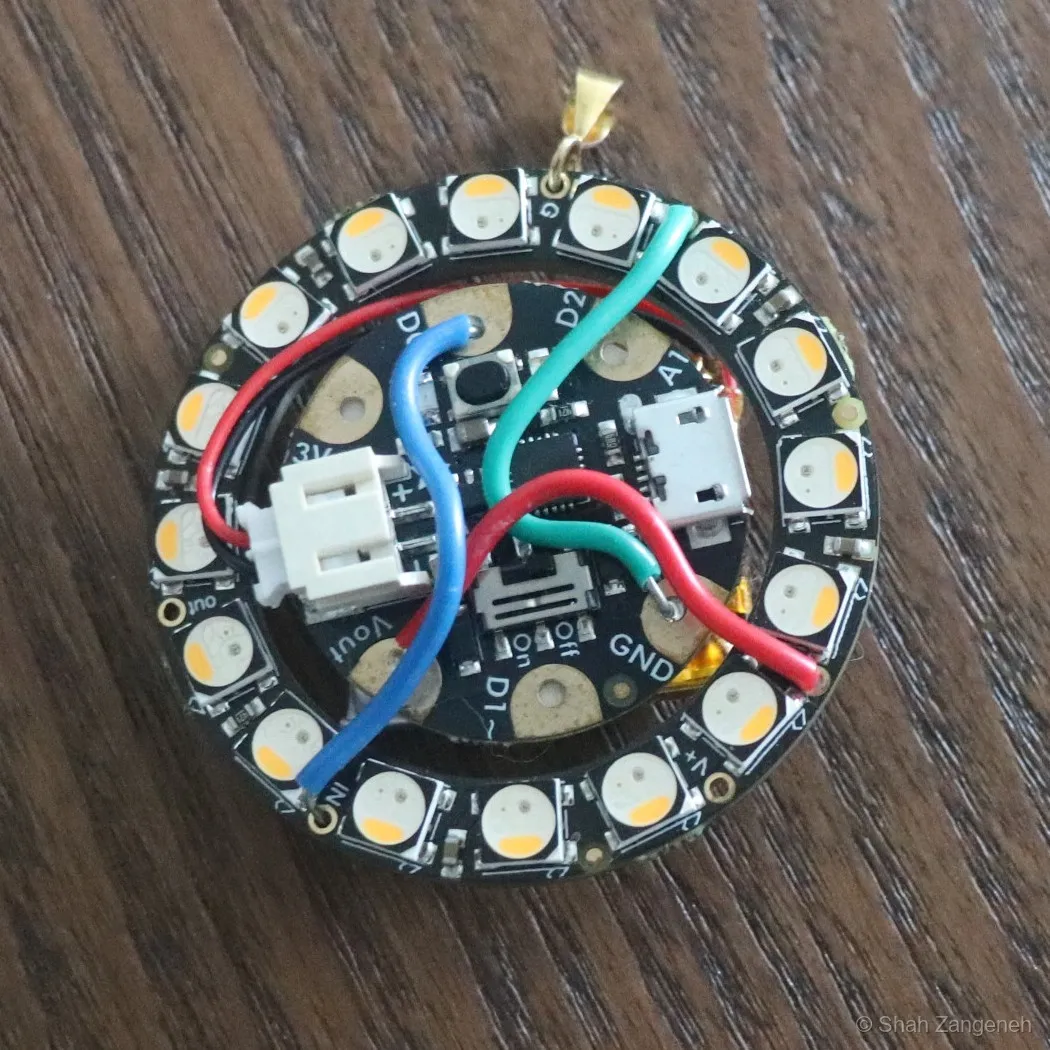
- Adafruit Gemma v2 — a microcontroller about the size of a quarter. Runs Arduino, charges via micro-USB, three GPIO pins.
- Adafruit NeoPixel Ring 16 RGBW Warm White — 16 individually addressable LEDs in a ring, with a dedicated warm white channel in addition to RGB.
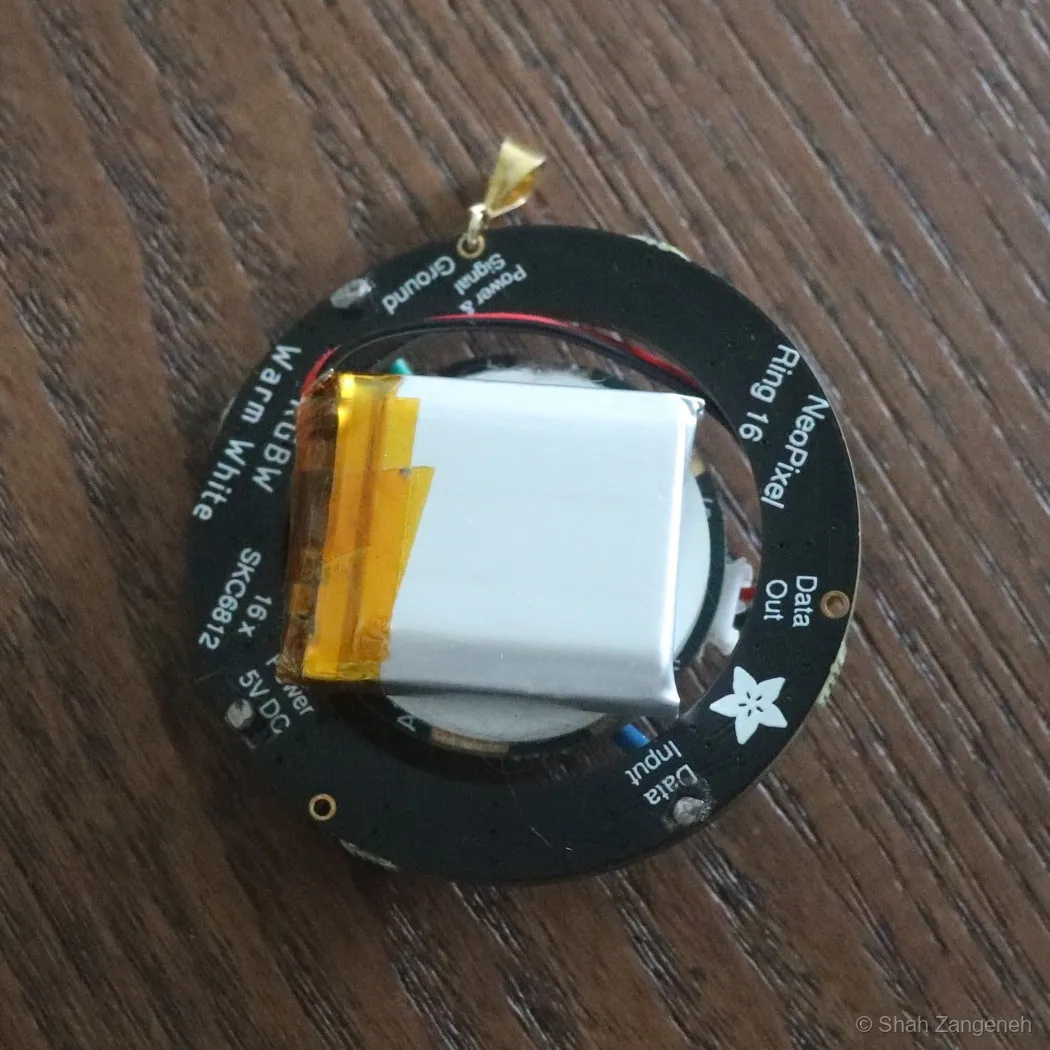
- LiPo battery — mounts on the back of the ring.
- 925 sterling silver bail (gold open loop) — attached through the NeoPixel ring’s top ground through-hole and pinched closed with pliers. Not soldered — a metal bail through a PCB through-hole is technically a short risk if it contacts adjacent pads, but it’s held up fine.
The Gemma sits in the center of the NeoPixel ring, connected to power, ground, and pin D0 for data. The ring has labeled through-holes for all three. The whole assembly is about 44mm across.
The battery situation
The Gemma’s JST connector uses Adafruit’s polarity convention, which is the reverse of most third-party LiPo packs. The first batteries I ordered (Liter 3.7V 150mAh cells) came with standard polarity and needed their connector wires swapped before they’d work with the Gemma at all.
The Blomiky 6-in-1 charger I bought alongside them turned out to have the same problem in reverse: it was also standard polarity, which meant the now-reversed batteries needed their wires swapped back every time they needed to be charged. I replaced it with the Adafruit Micro-Lipo charger — USB-C, $5.95, wired to Adafruit’s polarity convention — and the wire-swapping stopped. Before I made that switch, I’d already connected one of the reversed batteries to the Blomiky without thinking it through. Reversed polarity on a LiPo charger is not recoverable. That battery is gone.
Moving from earrings to a necklace also meant a battery upgrade. The 150mAh cells were adequate for a prototype, but a pendant on a chain can carry something bigger. The AKZYTUE 3.7V 200mAh cells have more capacity, and the extra weight is irrelevant on a chain.
The OSU pendant
The OSU firmware cycles through five modes automatically, 10 seconds each:
- Sparkle — random LEDs flash scarlet or gray
- Checker static — alternating red and gray around the ring
- Checker spin — the alternating pattern rotates
- Half and half — top 8 LEDs scarlet, bottom 8 gray
- Half spinning — that half-and-half block rotates continuously around the ring
The colors:
const uint32_t SCARLET_RED  = pixels.Color(200, 0, 0, 0);
const uint32_t BUCKEYE_GRAY = pixels.Color(5, 5, 5, 0);
The gray took some thought. NeoPixels don’t have a gray mode — at full brightness, equal R, G, and B gives you white. To get something that reads as gray next to saturated red, all three channels have to come way down. Color(5, 5, 5, 0) is barely lit, but placed next to Color(200, 0, 0, 0) it looks like exactly the dim neutral you want. The final 0 is the warm white channel — leaving it off keeps the color from going warm.
The other thing worth noting is that none of the animation code uses delay(). A blocking delay freezes the microcontroller — the mode timer stops counting, nothing else can run. Instead, every animation checks elapsed time with millis():
if (now - lastSparkle >= sparkleInterval) {
    // update frame
    lastSparkle = now;
}
Each frame asks: has enough time passed since the last update? If yes, advance. If not, skip. The mode-switching timer works the same way with a longer interval. Nothing ever blocks.
The Christmas pendant
The Christmas firmware has five modes of its own:
- Twinkle — all LEDs hold a very dim glow, with four random sparkles per frame in red, green, white, or blue
- Spin red/green — alternating red and green rotate around the ring
- Chase — one LED per color chasing around the ring continuously
- Spin red/white — alternating red and white
- Fade — all 16 LEDs breathe in and out, grouped in the four Christmas colors
The fade mode is the most visually interesting. Each LED is assigned a color by its index (i % 4), and all of them breathe together off a single counter:
fadeValue += fadeDir;
if (fadeValue >= 255) fadeDir = -1;
else if (fadeValue <= 0)  fadeDir = 1;

for (uint8_t i = 0; i < NUM_LEDS; i++) {
    uint8_t idx = i % 4;
    uint32_t c = (idx == 0) ? pixels.Color(fadeValue, 0, 0, 0) :
                 (idx == 1) ? pixels.Color(0, fadeValue, 0, 0) :
                 (idx == 2) ? pixels.Color(fadeValue, fadeValue, fadeValue, 0) :
                              pixels.Color(0, 0, fadeValue, 0);
    pixels.setPixelColor(i, c);
}
fadeValue bounces between 0 and 255, flipping fadeDir at each end. All four color groups scale off the same value, so the whole ring pulses as one piece.
The twinkle mode reuses the same low-glow trick from the OSU sketch — Color(5, 5, 5, 0) as a base so the ring isn’t fully dark between sparkles.
The reveal
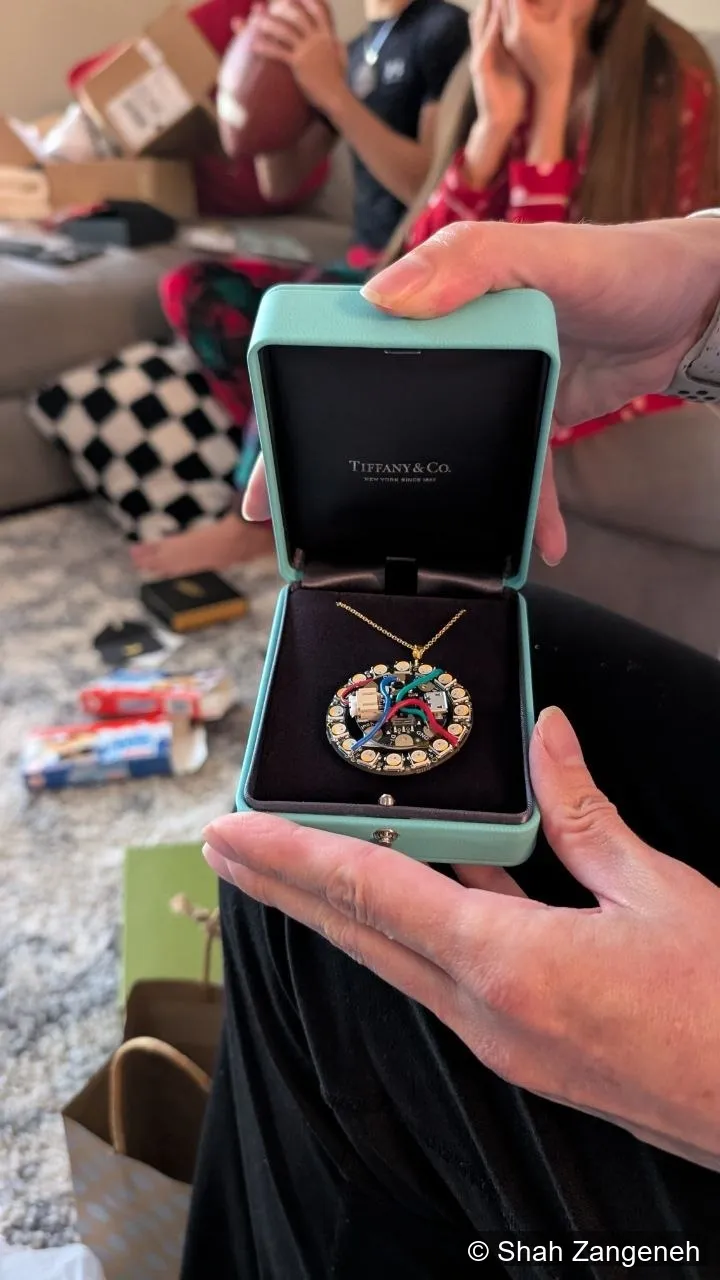
I’d already hinted I was making something by hand, which made the Tiffany box genuinely confusing. She opened it expecting jewelry. What she found was a circuit board. I think she assumed the box was being repurposed — maybe a gag. The Tiffany salesperson had asked, only half-joking, whether the pendant was “going to explode or anything.”
It wasn’t a gag. The chain is real Tiffany — the box came with it when I bought the chain. Though the electronics inside cost only about $40. I showed her how to turn it on and told her about the time I’d spent getting the OSU gray right.
She loved it.
Demo
Code
Both sketches are on GitHub: shamzy001/neopixel-necklace. Each file is self-contained — flash whichever you want and it runs.
The Gemma v2 is no longer stocked. If you’re starting fresh, you’ll end up with the Gemma M0 — same form factor, different chip, still works with Arduino IDE. The sketches here are written for the v2 and untested on the M0, but the NeoPixel library and millis()-based timing work on both, so it should be close to a drop-in.
Parts:
- Adafruit Gemma v2
- NeoPixel Ring 16 RGBW Warm White
- Liter 3.7V 150mAh LiPo (prototype) or AKZYTUE 3.7V 200mAh (upgraded)
- Adafruit Micro-Lipo Charger, USB-C
- 925 sterling silver bail, gold open loop (10-pack — you’ll have plenty left over)
- Double-sided foam mounting pads — for securing the battery to the back of the ring
- Tiffany chain (optional, but it helps)